Setting up your Illumibot⚓︎
This guide covers the Illumibot device, from unboxing to your first creation. Using only your phone and a cable? Head to illumiFun instead.
Short on time? The app walks you through all of this. Open the Home tab, choose Illumibot under Get started, and follow the checklist. For short video walkthroughs, see Profile → 2-min tutorials.
What's in the box?⚓︎
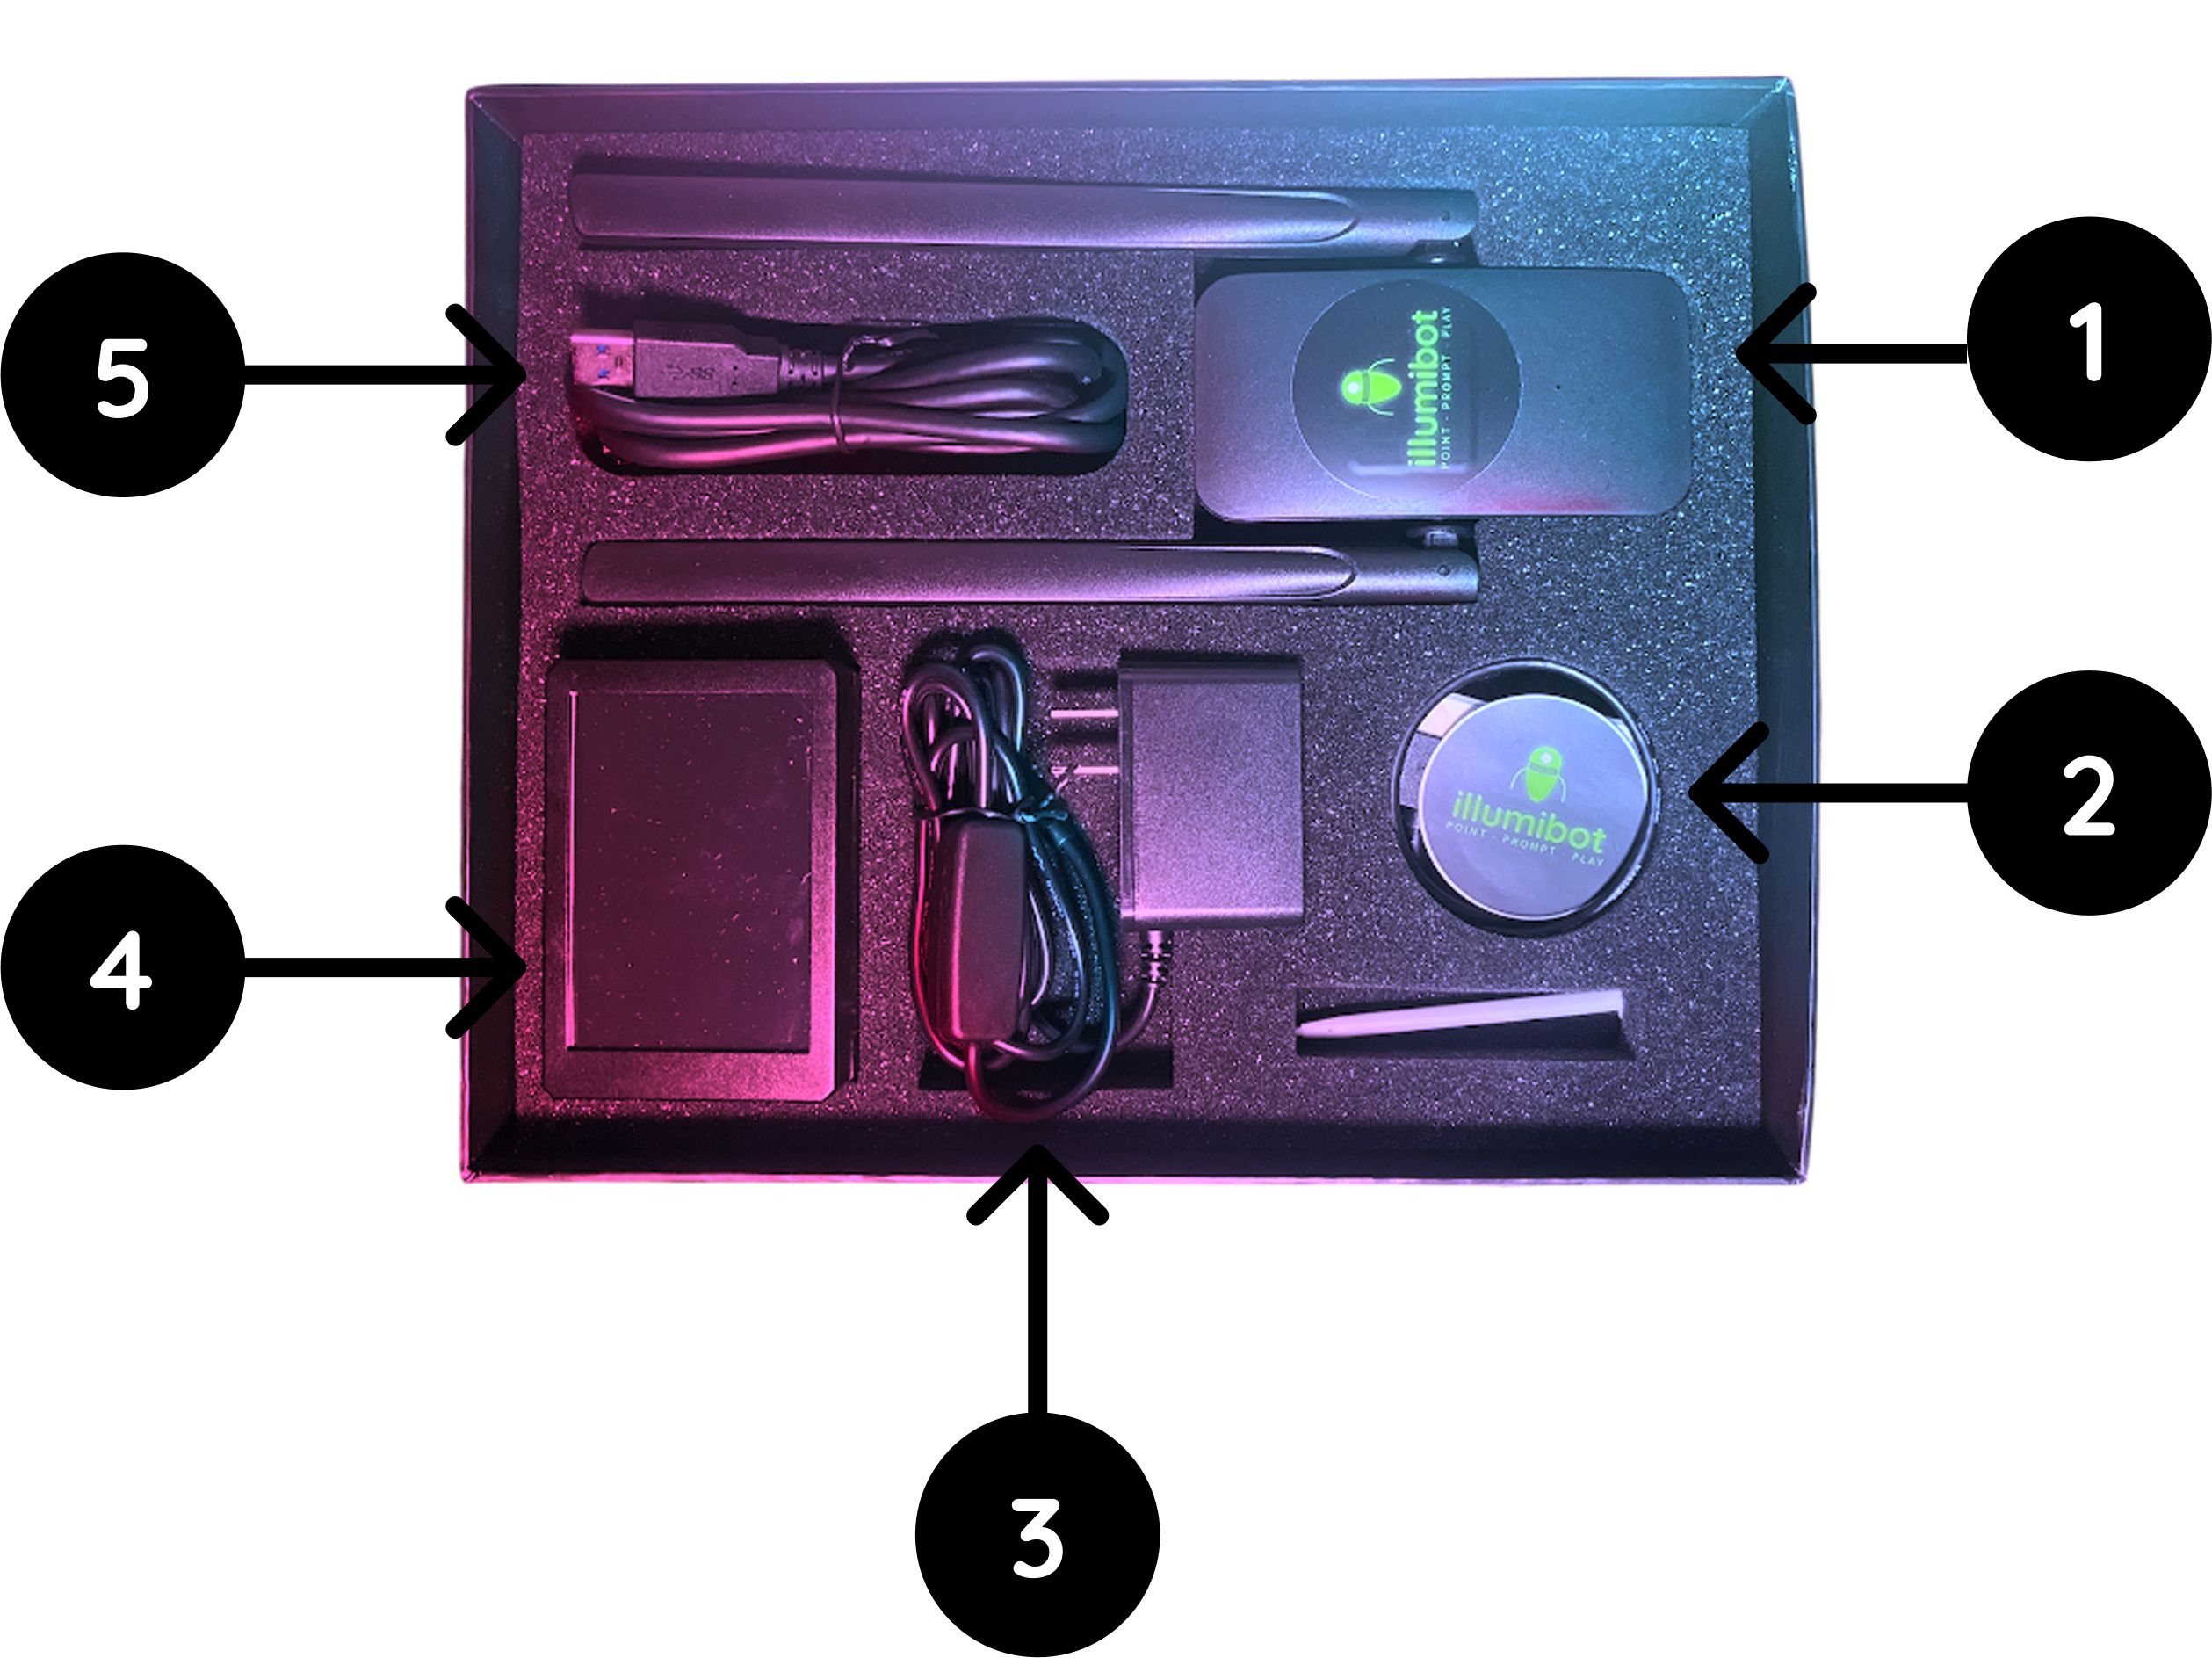
- Wi-Fi Adapter — connects the Illumibot to your Wi-Fi network.
- Illumibot Power Adapter — powers the Illumibot.
- HDMI Cable — connects the Illumibot to your projector.
- Illumibot Device — the main unit.
- Wi-Fi Adapter Cable — connects the Wi-Fi adapter to the Illumibot.
You'll also need a projector. See the Projector Selection Guide if you haven't picked one yet.
Step 1: Set up your projector⚓︎
- Put your projector on a flat, steady surface, aimed at where you want to project.
- Power it on and switch to the correct HDMI input.
- Adjust the focus until the picture is sharp.
Step 2: Set up your Illumibot⚓︎
- Before you power on the Illumibot, connect it to the projector with the HDMI cable.
- Make sure the Wi-Fi adapter is plugged into the Illumibot.
- Connect the power supply and press the red button to power it on.
- When it's on, tap the Illumibot's screen, tap Connect Wifi and join your Wi-Fi network. The included stylus makes the small buttons easier to tap.
- Once it's online, go back to the Illumibot's home screen.
Step 3: Connect the app to your Illumibot⚓︎
- Download the app from the Apple App Store or Google Play Store, and create your account.
- On the Home tab, tap Connect your illumibot. You can also start from the Point tab with Get Started (or Add a bot if you already have one).
- On the Illumibot's home screen, tap Connect App to show a QR code.
- Line up the code inside the frame in the app. The app needs camera access for this.
- On We found an illumibot, check the ID matches the one on your Illumibot, then tap Onboard.
Can't scan? Tap Can't scan? Search your network instead. The app searches your Wi-Fi for about 6 seconds and offers to onboard any new Illumibots it finds. Your phone must be on the same Wi-Fi network as the Illumibot.
Replacing an old Illumibot?
If you already own an Illumibot, you'll also see Replace your existing illumibot. Choose it to move the old device's name and locations onto the new one. The old Illumibot is then unlinked from your account. You can also do this later from the device's settings. See Point.
Once the Illumibot is onboarded, your projector shows a white image and the app opens Edit Illumibot so you can set up your first location.
Step 4: Set up a location⚓︎
A location is one projection setup: the surface you're projecting on, plus its photo, alignment and mask. You can save several locations per Illumibot (say, "Garage door" and "Front of house") and switch between them any time.
When a location isn't finished yet, the app asks you to pick a Setup Mode:
| Mode | Best for |
|---|---|
| Automatic Setup (Beta) — Easy · Quick | Most Illumibot setups. The app takes the photo and aligns for you, using your phone camera on a stand. |
| Advanced Setup — Full Control | Uploading your own photo, adjusting corners by hand, and projectors mounted on their side. |
Then work through the steps:
- Name — give the location a name, such as Garage door.
- Photo (Advanced only) — take a photo of the surface from beside the projector lens. See the photo tips below.
- Alignment — line up the projection with the real surface. See Alignment.
- Mask — paint the area the projection should fill. See Masking.
- Prompt — tap Begin prompting to make your first creation.
In Advanced Setup, you may also see Resolution and Projector Rotation before these steps:
- Projector Rotation — if your projector is on its side, set it to Left or Right so your content is made in portrait.
- Resolution — set this before you align. Changing it later means aligning again.
When your first location has both a photo and a mask, the Prompt, Play and Explore tabs unlock.
Photo tips⚓︎
The better your photo, the better your AI creations fit your surface.
- Hold your phone 2–3 inches above the projector lens, as close to the lens as you can get.
- Zoom in so the surface fills the frame.
- Use a 16:9 or 4:3 camera ratio, or 9:16 / 3:4 if the projector is on its side. Full and Screen-fit camera modes are rejected.
- While you take the photo, your projector shows a plain white image to light up the surface.
Projecting onto a different surface?
Create a new location rather than replacing the photo on an existing one.
Alignment⚓︎
Alignment makes the projection land exactly on your surface. The first time, the method depends on your Setup Mode. To redo it later, tap Adjust Alignment and choose a method:
-
Automatic (Illumibot only) — the projector shows patterns while your phone, on a stand, photographs them. Before you start:
- Dim the lights, and keep pets, fans and shadows out of the shot.
- Turn up your volume, turn on Do Not Disturb, and turn off Portrait Lock.
- Allow up to 10 minutes.
For how the app finds the surface, choose Auto Detect (try this first), Pick Projection Area or Place Dots Manually. When it finishes, check the result on your projector. If it's off, choose Start over or Adjust manually. - Corner Pinning — drag the four corners by hand until the projection matches the surface. Reset starts over, and Save keeps your changes.
Every alignment you save is kept. To go back to an earlier one, open the device's settings and tap View Alignment History → Restore.
Masking⚓︎
The mask tells the AI where to draw. White areas get generated content; black areas stay dark.
- Tap Begin Masking. The editor opens in landscape.
- Tap the surface and AI selects it for you. You can also let AI find objects in the photo, or paint by hand.
- Your projector previews the mask live as you edit.
- Save. An empty mask is rejected, because it would project a black screen.
Step 5: Create something⚓︎
Tap Begin prompting, or open the Prompt tab. Make sure the right location is selected, describe what you'd like to see, and send. See Prompt for the details.
Tips for success⚓︎
- Pick the right projector. Brightness and throw distance matter most. See the Projector Selection Guide.
- Practise on something simple first, such as a square box, before moving on to a whole house.
- Take your photo close to the lens.
- Keep the projector still. If it moves, redo the alignment, or start a new location.
- Check the active location before you create, so your images fit the right surface.
Stuck? Tap Need Help? on your Profile to open a support ticket. We'll get back to you as soon as we can.